How to make a resume, step by step
A first resume, start to finish: what to gather, which sections to write, what to cut, which file to send.
9 minute readPublished Updated
Short answer
Collect your history before you open a template, because remembering and writing at the same time is what produces vague lines and dates you are unsure of. Then fill the settled skeleton: contact line, summary, experience newest first, education, and everything else after that. Put your effort into the top of page one, cut whatever you would not want to be asked about, and send the file the posting asked for.
Do this next
- Give one evening to writing down every role, date, credential, and result.
- Lay the sections out in the usual order before you write a single line of copy.
- Draft the top of page one first: contact line, summary, newest role, best evidence.
- Take out anything you would not be glad to be asked about at interview.
- Export a text PDF, paste it into a plain editor, and read what survived.
Step one: gather your history before you write anything
Start with facts. Almost every bad first resume comes from opening a blank page and trying to reconstruct several years of work from memory while worrying about fonts. Those are two different jobs. Doing them at once produces vague bullets and dates you are unsure of. Collect the raw material first, and the writing turns into selection.
Write down more than you will use. A resume is a subset of your history chosen for one job, so the store behind it should be longer than anything you send. Every role gets its employer, your exact job title, the month and year you started and finished, and two or three specific things that happened because you were there. Where you have a number you can stand behind, record it now, with enough context to explain it in an interview a month later.
Our product is built around this step, and that is the honest reason it works for someone starting from nothing. You assemble your history once, review it, and approve it. Everything generated afterwards, every tailored resume and every cover letter, is composed from that approved record rather than from memory or from a chat you had last week. The facts stay stable while the emphasis changes per application.
- Every roleemployer, exact job title, start and end month and year.
- Two or three specific things that happened because you were in each role.
- Educationinstitution, qualification, dates, and a grade if it helps you.
- Certifications and licences, with who issued them and the year.
- Projects, volunteering and coursework you could talk about for five minutes.
- Numbers you can stand behind, with enough context to explain them later.
Step two: which sections to include, and in what order
The default structure is settled, so treat this step as a skeleton to fill rather than a design decision. Write the parts in the order below and you will not reorganise later. Our page on what a resume should look like works the finished shape through, including why each block sits where it does.
Only one placement genuinely moves, and it is the one a first resume gets wrong: education leads while you are a student or a recent graduate, and drops below your work history as soon as you have real roles to show. Everything else stays put. In particular, do not reorder your history to soften a gap or a short stint, because that reads as concealment; our separate guide on employment gaps handles those in words instead.
- Contact line, then summary, then experience newest first, then education, then everything else.
- Education above experience while you are studying, below it once you have jobs to show.
- Reverse chronological throughout, because the reader is asking what you do now.
- Single column with real headings. A sidebar design can cost you with the reader and with a parser, which may read the two columns straight across.
Source: How to write a CV, National Careers Service (UK government)
Step three: write the top of the page
The top of page one decides whether the rest gets read, so your effort goes there. Three things belong in it: your name and contact line, two or three lines of summary, and your first role with your strongest evidence under it. Our page on what a resume should look like explains what that block is doing and why the usual additions cost more space than they earn.
Two traps catch a first attempt. Nothing essential should live only in a header or footer, because that is a part a converter or a parser may skip when a file is reformatted by an intermediary. And the summary has to be two or three lines nobody else could publish truthfully: name the work you do, give one concrete piece of evidence, finish with the direction you are moving in. If it would fit any candidate in your field, it is decoration. Our guide on writing a summary that is not generic has the rewrites, and the one exception to all of this is a German Lebenslauf, which conventionally carries a full postal address where English-speaking markets do not.
Step four: write the experience section
A bullet describes what happened because you were there, not what you were responsible for. Duty language is the default failure of a first resume, and it is easy to spot: if a line would be identical for every person who has ever held your job title, it is a job description rather than evidence. Lead with the outcome, then say what you did to get it, and keep the technology or method at the end where it belongs.
Specificity is what makes a bullet survive scrutiny. A line an interviewer cannot question may as well not be there, and a vague claim invites the follow-up you cannot answer. Where you have a number, treat it as a conversation opener. You should be able to say where it came from and what it excludes. Where you genuinely have no number, describe the change concretely instead of inventing one. Plenty of good work has no clean metric, and a made-up figure collapses under one question.
More bullets for a recent, relevant role, as many as you have distinct contributions for; one line, or none, for something from twelve years ago that establishes trajectory and nothing more. The bullet points guide has the structure and the weak-to-strong rewrites, and the annotated examples page shows the same edits on complete documents.
Step five: cut what is not doing work
A first resume usually improves more by subtraction than by addition, and one question does nearly all the sorting. For each line, would you be glad if the interviewer opened with it? Cut by relevance rather than by shrinking the type, which fools nobody and strains the reader.
The full cut list, with the reasoning behind each item, sits on the page about what a resume should look like. Below are the four that catch a first resume specifically, because each one is something a beginner is likely to have been told to include.
- High school details, once you hold a degree or any real work history. Indian early-career hiring is commonly the exception, and the Indian format guide covers what stays on and for how long.
- The objective statement, replaced by a summary.
- Photographs, date of birth, marital status and full postal addresses, in English-speaking markets generally; a UK CV leaves off age, date of birth, marital status and nationality.
- Anything you would not want to be asked about in an interview, which usually means a skills cloud and a tool you touched once.
Source: How to write a CV, National Careers Service (UK government)
Step six: length, file format, and the last check
Length follows your evidence rather than your ambition: one page while the relevant material fits on one, and two once it genuinely does not. For a first resume the answer is almost always one page. Our guide on one page or two owns this question and works through every case where the call is not obvious, including the half-filled second page.
On file format, send exactly what the posting asks for. Where nothing is specified, a text-based PDF is a sound default because its layout stays fixed instead of reflowing in whatever opens it, and Word is the right answer when a recruiter or agency intends to edit it. Never send a scan or a photograph of a printed resume: there is no text layer to extract and not every system runs character recognition over it. The PDF versus Word guide covers the trade-off, and a separate page covers converting a scan into real text.
Then do two checks. Select all the text in your finished file and paste it into a plain text editor: if what you get is complete, in the right order and free of odd characters, a parser will very likely read it the same way. And proofread it properly, ideally the next morning and out loud, because a typo in a document you had unlimited time to check is the cheapest possible reason to be set aside. Our exports run the mechanical half of this automatically, extracting the text from the finished PDF and re-inspecting the Word file before you download either, which is what we mean by parse-checked.
Treat the finished document as a starting point. The version that gets read is the one aimed at a specific posting, and tailoring is reordering and reselecting true material rather than rewriting your history. If you are applying abroad, check the conventions for that market first, because the personal details block at the top is what differs most between countries.
Common questions
How do I make a resume if I have never had a job?
How long should making a resume take?
Should I use a template?
Do I need a cover letter as well?
Do I need a different resume for every application?
Use this in Handmade Resume
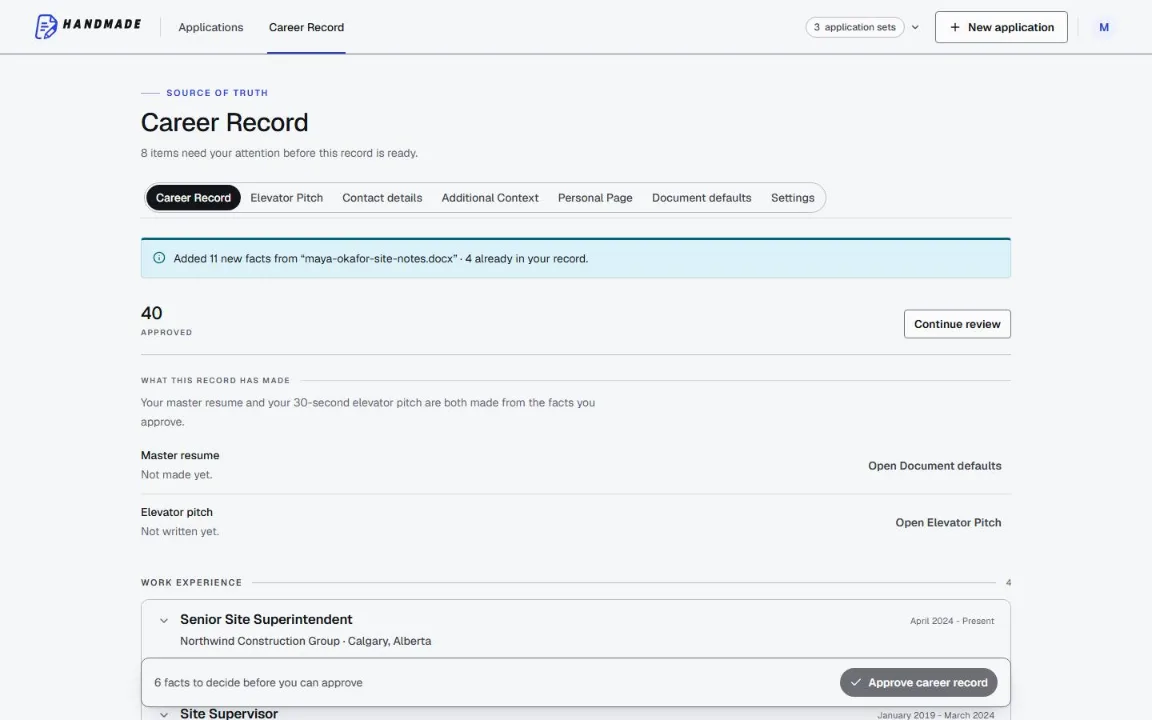
Keep your full work history in one Career Record, then tailor the top of your resume for the role you want. You can edit every line before downloading a format-checked PDF or DOCX.
2 complete application sets free, at the same quality as a paid plan. No card required.